How to install Slimline water tanks in Geelong?
- Written by NewsServices.com

Slimline rainwater tanks are gaining huge popularity in recent years. This is because they have become ideal for urban locations that have very limited space.
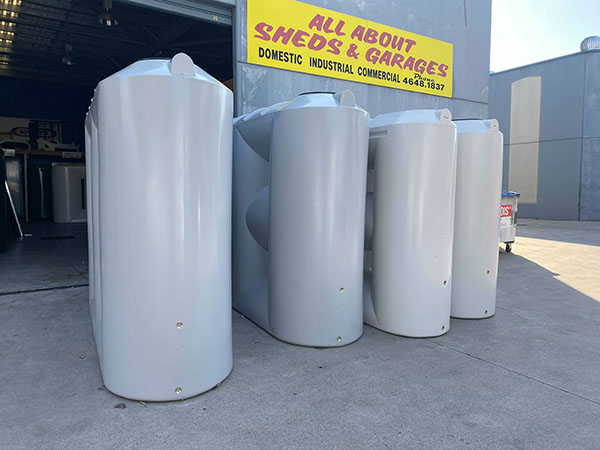
These tanks can be easily mounted against a wall, beneath a window, or even in a narrow space because they are super slim in nature. The slimline water tanks come in other varieties of shapes and sizes as well like upright and horizontal.
Other than that, the slimline tanks are made up of opaque polyethylene that enables one to see the water level at a glance. Installing these Slimline water tanks is not an easy task. You may require proper guidance to get the work done efficiently. However to be precise, here are a few steps listed below that can help you with the installation.
-
Slimline tank sitting area
First, you need to decide the sitting area of the slimline tank to get started.
You can simply get started with walking around the house and searching for locations of downpipe that leads towards the downward side of your home.
Also, keep the area size and space in mind so that the tank can be easily placed.
-
Building a foundation surface
Once you have found the right spot, now focus on building a foundation surface on which you would want to place the tank.
The foundation should have a firm-level base and must be established closed to the wall.
You can use different materials like bricks, concrete, solid dolomite, and others to create the foundation.
-
Get started with the plumbing
After the foundation has been built, now you need to begin with the plumbing work. If the slimline water tank needs to be linked to the property, then you should continue the task in compliance with local council requirements.
However, it is recommended to continue with the plumbing process by counting on a professional plumber in Geelong.
This is because a small mistake can end up making you bear unwanted expenses and losses.
-
Install downpipe
Now it is time to install a downpipe for which you must get started by drawing a plan. Find out how many elbows and connectors you would require for this process.
After that, according to the drawing, you will have to cut and stick the pipes together using glue.
Remember to use a holding bracket mount on the wall and attach a section of the piping in it. Lastly, continue to glue the remaining parts.
-
Install overflow pipe
Like the downpipe that flows into your tank, the overflow piping should be prepared and attached. To keep your tank warranty valid, make sure you have installed it correctly.
Furthermore, remember to use the flexible pipes first so that any kind of movement can be absorbed and the stress over the tank can be reduced.
Hence it is recommended to place the overflowing pipes down the wall so that it does not create stress on the tank and other fittings.
-
Install other accessories
After you are done with installing the slimline water tank, now shift your focus to other accessories that you may require.
This starts from installing a tap, gutter screening, a rain head, first flush, pump, and cover.
As every single accessory has its own uses, make sure to prioritize your requirements and then proceed with the installation.
Are the Slimline water tanks really worth it?
The short answer to this question is yes. Slimline water tanks are really worth the installation as it comes with multiple advantages.
These tanks work on a simple principle where water is not only stored but cleaned for drinking, bathing and can be used for a variety of different purposes. It is easy to maintain and prevents insects and debris from entering the water supply.
People working in the agricultural sector bear the most fruitful results as these tanks are well suited for irrigation. It also lowers the risk of flooding in the area where an individual resides. Besides that, this water solution can help one to save a lot of money than imagined.
Not to mention, with so many advantages to come with, slimline water tanks are perfect for those who want to live in an eco-friendly surroundings.


